A
B
C
D
E
F
G
H
I
J
K
L
M
N
O
P
Q
R
S
T
U
V
W
X
Y
Z
Click a letter to see a list of conditions beginning with that letter.
Click 'Topic Index' to return to the index for the current topic.
Click 'Library Index' to return to the listing of all topics.
After Hip Replacement: Using Your Walker
After hip replacement, you’ll likely use a walker to get around while you recover. There are a few types of walkers:
-
The standard nonrolling walker
-
The 2-wheeled (front) rolling walker
-
The 4-wheeled rolling walker
Your physical therapist or occupational therapist will teach you how to use a walker safely and help you choose the best one for you. Later, you may change from a walker to crutches or a cane.
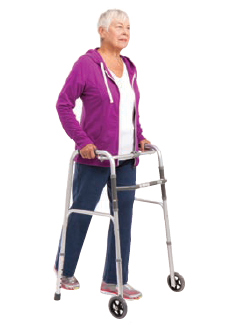
Using a walker
-
Move the walker a few inches in front of you.
-
Lean on the walker so it supports you. Step into the center with your operated leg. Then step forward with your good leg. Repeat.
-
As you get more comfortable, you’ll be able to move the walker as you step.
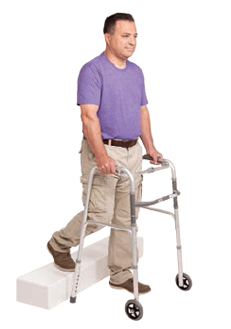
Walking up a curb
-
Move your feet and walker as close to the curb as possible.
-
Put your weight on both legs, and then lift the walker onto the curb.
-
Step on the curb with your good leg. Using the walker to support your weight, bring up your operated leg.
Walking down a curb
-
Move your feet and walker as close to the curb as possible.
-
Lower the walker onto the ground, keeping its back legs against the curb.
-
Using the walker to support your weight, lower your operated leg. Then step down with your good leg.
-
Never climb stairs or use an escalator with your walker.
Online Medical Reviewer:
Elizabeth Oswald PT DPT
Online Medical Reviewer:
Rita Sather RN
Online Medical Reviewer:
Trina Bellendir PT
Date Last Reviewed:
9/1/2024
© 2000-2026 The StayWell Company, LLC. All rights reserved. This information is not intended as a substitute for professional medical care. Always follow your healthcare professional's instructions.